 In this blog post , I am going to list the steps involved in transition from a Windows 2003 R2 Small Business Server Domain Controller to a Standard Windows 2012 Domain Controller.
The server involed in this process are:
Windows 2003 Small Business: adc-sbs
Windows 2012 Standard: adc-2012.
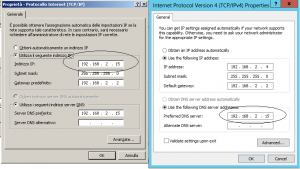
First of all, I’ve installed the Windows 2012 Server using a static IP address and set the preferred DNS server “pointing” to adc-sbs ip address. Next we have totally updated both Servers with all the latest Windows, and verified that the date/time is correct.
Backup
First of all: backup !
We always need to ensure that we take a complete backup along with System State Backup of the SBS Server if something goes wrong.
Check AD
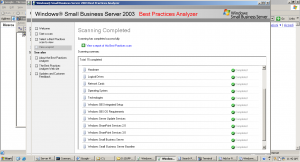
To ensure a seamless transition we need to perform an health check of AD in Windows SBS 2003 using tools like dcdiag.exe (contained in Windows 2003 Support Tools) and Microsoft Windows Small Business Server 2003 Best Practices Analyzer (see linkografia).
Uninstall UnUsed Software
In the new Windows 2012 environment I won’t use Exchange, WSUS and other stuff: for this reason, and also to avoid problems, my advice is to uninstall any software or service that is not useful in the Windows 2003 SBS. The procedure I usually follow in such cases is to make to make a list of software to uninstall: after that I uninstall of the first one, wait a few days to see that there are no problems between the users and other installed services, and then uninstall the later program in the list.
Exchange is often very difficult to remove, but we have to uninstall fully, to make sure AD is cleaned up during the migration process.
Remove Legacy GPO
To simplify the transition to the new server, we need to minimize the number of GPOs involved.
Also the Group Policy objects are updated a lot for Windows 2012: these are not simply a superset of the Windows SBS 2003 GPOs, but some of then can be incompatible.
For this reason it is best to just leave the “main” GPOs, deleting all the others: at the end of the migration process we can recreate in the new environment the GPOs taking advantage of the new capabilities.
- Open Server Management: in the navigation pane, click Advanced Management, click Group Policy Management, and then click Forest: <Your Domain Name>.
- Click Domains, click <YourDomainName>, and then click Group Policy Objects.
- Right-click Small Business Server Auditing Policy, click Delete, and then click OK.
- Repeat the step to delete all of the others GPOs: recommend leaving only Default Domain Controllers Policy and Default Domain Policy.
- At the end click WMI Filters, and delete all the items (PostSP2, PreSP2, etc)
Remove Logon Settings
Always to simplify the transition to the new server, and to avoid any issue in this process, we will remove any legacy an unused log script.
Att.: Windows SBS 2003 uses logon scripts to install software and for other tasks. In Windows 2012 these task can be replaced with a combination of GPOs and logon scripts, that work more efficiently.
- Click Start, and then click Run: type \\localhost\sysvol\<DomainName>.local\scripts, and then press ENTER.
- Delete or rename SBS_LOGIN_SCRIPT.bat and check the other cmd or bat files.
After that verify that all users’ profiles are updated to not use a logon script: to verify user profiles follow the next.
- Click Start, click Administrative Tools, and then click Active Directory Users and Computers.
- In the navigation pane, expand <DomainName>, expand My Business, expand Users, and then expand SBSUsers.
- Ctrl-click to select all user accounts, right-click the highlighted user accounts, and then click Properties.
- On the Profile tab, verify that the logon script check box is blank.
Set the minimum functional level
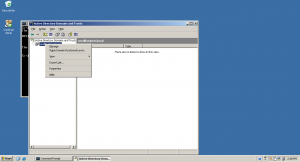
The minimum functional level must be at least Windows Server 2003: please control that the Domain functional level is set to Windows Server 2003, in AD Users and Computers right click the “Domain Name”. Also control that the Forest functional level is set to Windows Server 2003, in AD Domains and Trusts right click “Active Directory Domains and Trusts”.
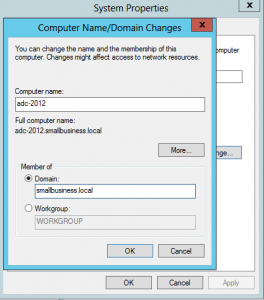
Join Windows 2012 to the domain
To join a domain, just click the current domain or workgroup name in Server Manager and .
A reboot will be required.
Install Active Directory Domain Services in Windows 2012
1) Start the Server Manager and choose “Add roles and features”, in “Before you begin” click next, in the “Installation Type” use “Role-based or feature-based installation” and click Next.
2) Choose adc-2012 and click Next.
3) Now check the Active Directory Domain Services and in the upcoming window click the “Add features” button.
4) Leave selected Group policy management and then Click Next and then choose “Restart the destination automatically if required” and press Install .
Promote the server to be a domain controller
1) After installing the Active Directory Domain Services feature on your server, it is possible promote it to be a domain controller. If you have just finished the feature installation, the AD DS Configuration Wizard begins automatically: however, if the feature installation has already been closed, you can start the Active Directory Domain Services Configuration Window by clicking the Tasks icon along the top of Server Manager and click “Promote this server to a domain controller”.
2) Supply the credentials for the operation: an administrative user in the domain.
3) Check “Add a domain controller to an existing domain”
4) Choose Domain Name System (DNS) server and Global Catalog (GC) and type the Directory Services Restore Mode password and then click Next.
5) Now you will be prompted with the warning in the next.
A delegation for this DNS server cannot be created because the authoritative parent zone cannot be found or it does not run Windows DNS server. If you are integrating with an existing DNS infrastructure, you should manually create a delegation to this DNS server in the parent zone to ensure reliable name resolution from outside the domain “test.local”. Otherwise, no action is required.
You do not need to be concerned about this warning message: click Next.
6) Choose Next and either use the default. Leave IFM (Install from media) Unchecked and click Next.
7) Location of the AD DS database, Log Files and Sysvol: here you can leave the default and click Next.
8) Click Next and then Next: here information about forest, schema and domain update is shown. Click Next and a prerequisite checks will be done.
9) Review the Check (usually all the warning can be ignored) and click Install.
A reboot is required and it happens automatically by default: at the end the Windows 2012 will be a DC. Pls check the event viewer for any possible problems.
Transfer FSMO roles to Windows 2012 server
Att.: After you move the FSMO roles away from Windows 2003 SBS you have 21 days grace period to keep the server box running. After the completion of 21st day, the server simply will stop to work: so it’s recommended to perform these final steps before this period end.
To transfer all 5 of the FSMO roles simply run the following command in PowerShell in Power Shell on Windows 2012 server:
Move-ADDirectoryServerOperationMasterRole -Identity “adc-2012” –OperationMasterRole PDCEmulator,RIDMaster,InfrastructureMaster,SchemaMaster,DomainNamingMaster
Once you transfer the FSMO roles to the new DC, adc-sbs will start to complain and shutdown itself down on regular intervals “by design” (pls see in linkografia Extend 21 day limit).
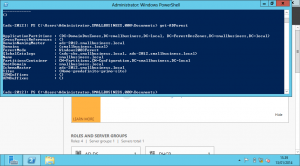
To check if adc-2012 hold all the AD roles use the next power shell commands.
Enter-PSSession adc-2012
Import-Module activedirectory
Get-ADForest smallbusiness.local
Get-ADDomain smallbusiness.local
Demote Windows 2003 SBS
Now it is possible demote the SBS server so it is no longer a domain controller and remove from network , reformat and use the hardware for any other purpose
Start -> Run -> DcPromo
Att.: Do no select the flag “Delete the domain because this server is the last domain controller in the domain” otherwise all will be deleted !
Final checks
In the windows 2012 server pls verify that in DNS server in Windows 2012 do not remain any reference to the old Windows 2008 server.
DNS zone smallbusiness.local → Properties → Name Server
You have to do the same check in the network connection: WINS, DNS, etc.
Least but not least the time server: in fact it is required to reconfigure the time service on the old and new PDCEmulator, so a recommended external time source is used.
The following command will force the time service in the new Windows 2012 server to do a syncronization, which will be reported in the System Event Log (pls check if all works fine) and set itself like a reliable time source in the AD smallbusiness.local. In the command line in the windows 2012 server the the following.
w32tm /config /syncfromflags:manual /manualpeerlist:pool.ntp.org /reliable:yes
w32tm /config /update
net stop w32time
net start w32time
That’s all……approximately….
Linkografia
Microsoft Windows Small Business Server 2003 Best Practices Analyzer
http://www.microsoft.com/en-us/download/details.aspx?id=5334
Windows 2003 SBS: Extend 21 day limit
http://blog.thesysadmins.co.uk/sbs-2003-to-sbs-2011-migration-extend-21-day-limit.html

 Follow