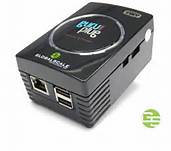
 To install the GuruPlug you need:
– JTAG Board
– TFTP server
– Linux Box connected to JTAG via USB (I’ve used Debian 8).
Connect the UART port to the GuruPlug and the JTAG board to your Linux computer.
On Dmesg.
usb 1-3: FTDI USB Serial Device converter now attached to ttyUSB0
On the linux box connected to JTAg via USB we need to install minicom to connect to JTAG & GuruPlug.
apt-get install minicom
Now we have to configure minicom to conect to JTAG & Guruplug
1) Serial Port Setup
> minicom -s
2) Selecting Serial port setup and then press E to edit the communication parameters.
3) To change the communication parameters, press the required key: E to set the Baudrate to 115200 and Q to set the databits, parity and stopbit to 8-N-1. This is the required setting for the GuruPlug Server Plus. When done press ENTER.
4) Back at the “Serial port setup” dialog, it might be necessary to set the right serial connection. The connection might be different on different operating systems, but on my box it is /dev/ttyUSB0.
5) Also make sure that Hardware and Software Flow Control are set to NO (using option F and G).
6) Select “Save setup as…” and enter a name for the settings, for example “infpress”
7) After saving, exit the minicom settings to get back to your console.
> minicom -o infpress
8) Turn on GuruPlug
9) If alla works fine you’ll see GuruPlug’s boot messages !
All the commands from here will be executed on the Marvell-prompt. Right after u-boot started, press any key to get into the Marvell-prompt.
1) Configure ip for GuruPlug and TFTP server
> setenv ipaddr [ip address for GuruPlug]
> setenv serverip [tftp server ip address]
2) Check bad block on NAND Flash hard disk.
> nand bad
(to see bad block)
> nand scrub
(clean bad block)
3) Download the kernel image (Debian 8), uImage and uBoot image: pls see in linkografia
4) Install uBoot
> tftp 0x6400000 [name file uboot - in my case SW-GP0GTIU02__uboot.guruplug_new.bin]
> nand write.e 0x6400000 0x0 0x100000
5) Reboot
> reset
6) At the reboot re-enter in Marvell-prompt
7) Configure ip for GuruPlug and TFTP server
> setenv ipaddr [ip address for GuruPlug]
> setenv serverip [tftp server ip address]
8) Install uImage
> tftp 0x6400000 [name file uImageSW-GP0GTIK02__uImage_3.13.10_guru]
> nand write.e 0x6400000 0x100000 0x400000
9) Install kernel image
> tftp 0x6400000 [name file root file system - in my case SW-GP0GTIR02__guru_debian7.img]
> nand write.e 0x6400000 0x500000 0x17400000
Att.: Do not worry about some bad blocks….
Att.: The complete command here is
>nand write.e 0x6400000 0x500000 0x
9) Reboot
> reset
10) You’ve done. To login use root and password nosoup4u
At the end you’ll have a Debian 8 Box !
Linkografia
Download Globalscaletechnologies

 Follow